
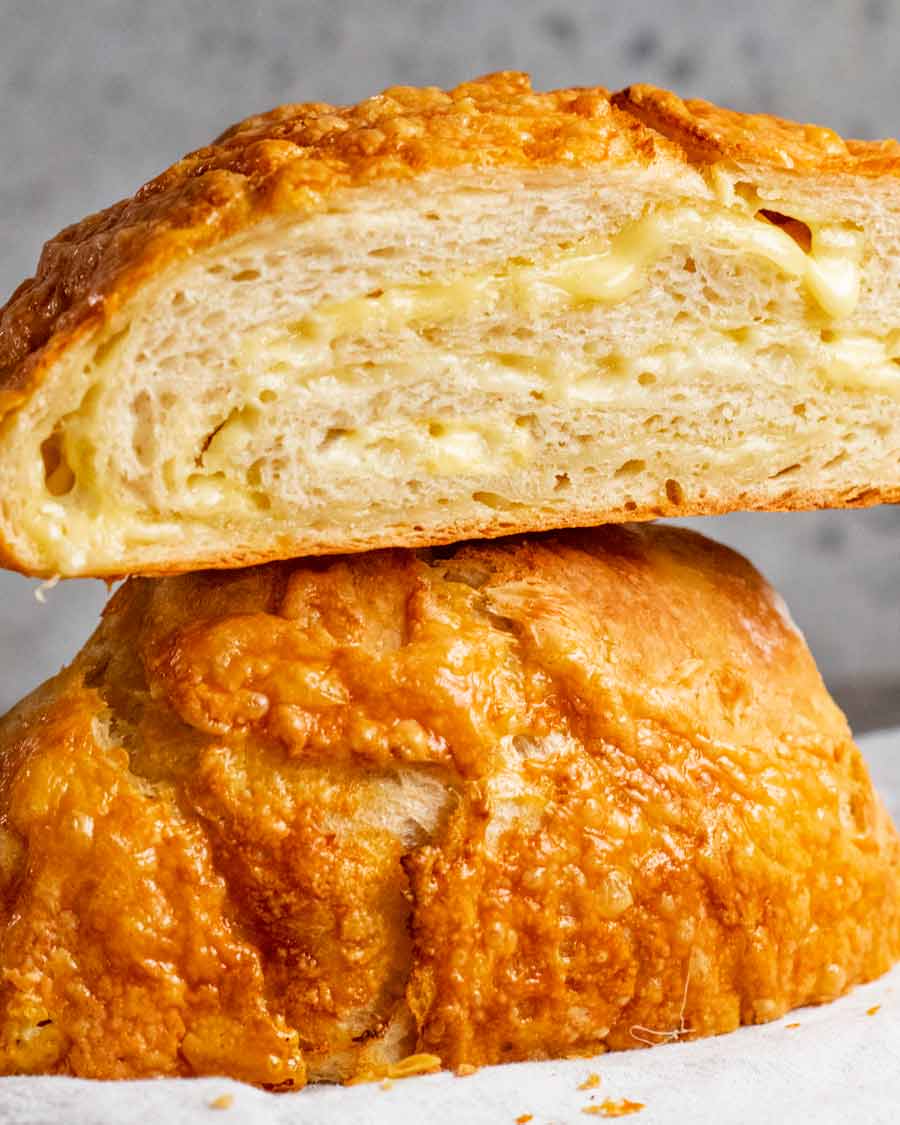
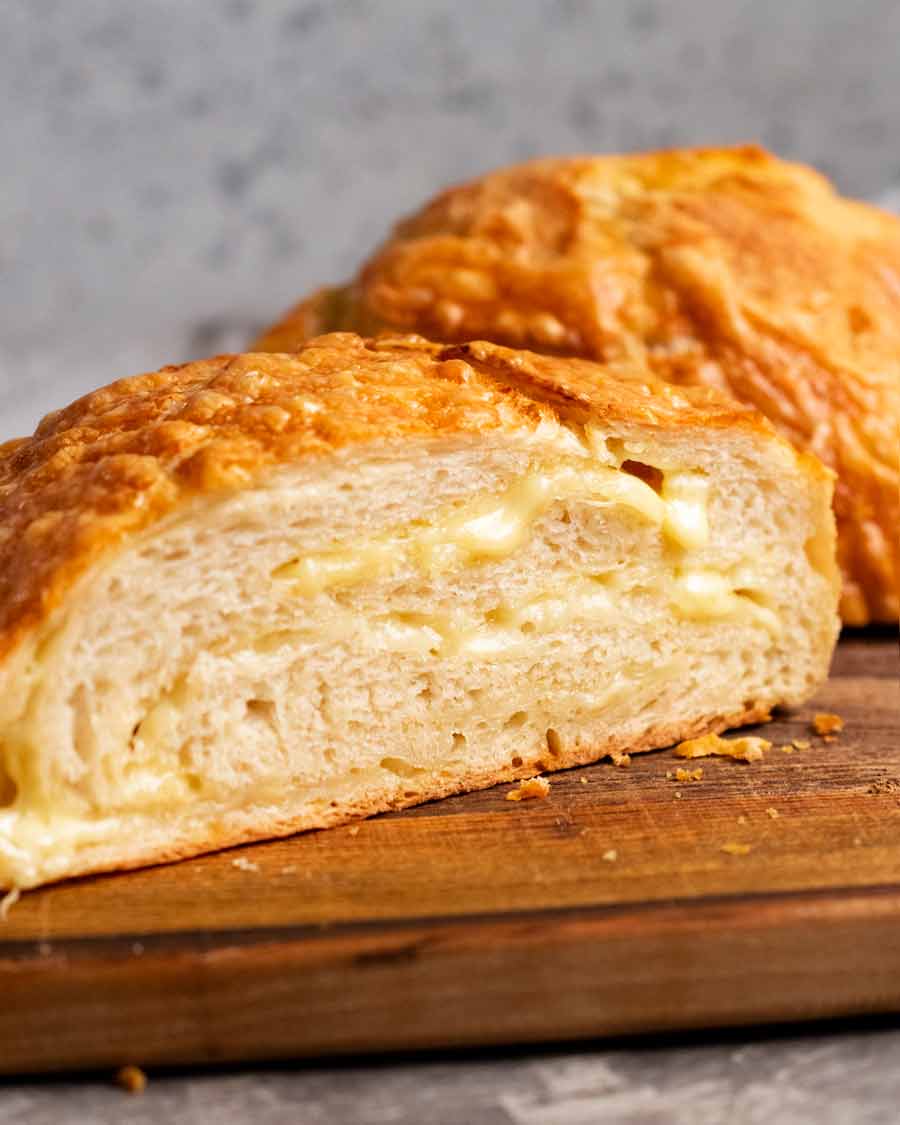
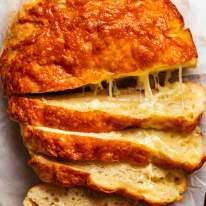
Swirls of cheese, an insanely golden crispy cheese crust, and soft fluffy crumb. This cheese bread is every cheese-loving carb-monsters’ dream come true! A very easy, no-knead bread recipe based on the beloved No-Knead Crusty Artisan Bread – are you ready for this??!

Cheese Bread
This is a bread you’d struggle to buy. Because I just can’t see any bakery cramming in as much cheese as I do. 250g – that’s half a pound! For un-missable cheese flavour.
Indulgent? Excessive? Perhaps.
But if I’m going to make a cheese bread, I want to do it right! None of this wimpy barely-there sprinkle of cheese on just the surface. I’d rather just make a plain loaf of bread and make a cheese toastie!
About this no-knead bread business
This gorgeous loaf is made using a no-knead bread dough that has been read over 7 million times since I published it in 2020. It’s tried and tested miracle recipe (thank you New York Times!) that’s easy enough for beginners yet seasoned bread enthusiasts appreciate its Artisan qualities.
Here’s how it goes down:
Mix flour, yeast, salt and water with a wooden spoon (10 seconds).
Leave to double in volume (1 to 3 hours).
Fold in cheese, shape in a round (5 minutes).
Bake (40 minutes). Eat (30 seconds).
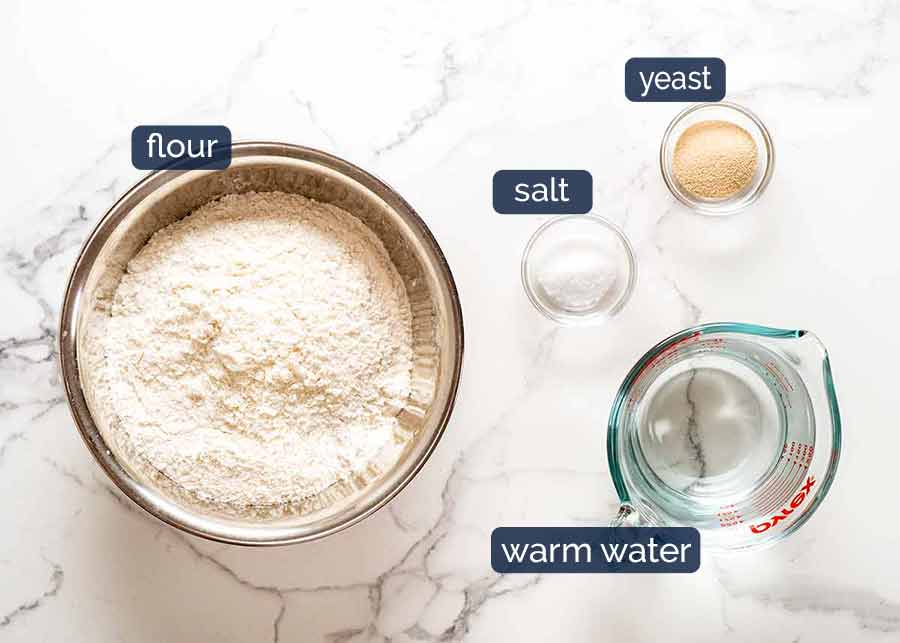
Ingredients
Here’s what you need to make this – yeast, flour, salt, water and cheese. Yep, really, that’s it!
For the bread dough
Bread flour is best, if you can – Use bread flour if you can. Bread flour has more protein in it than normal flour which means more gluten, and this makes the dough more elastic and yields a more fluffy yet chewy texture inside the bread, just like the (pricey!) artisan bread you get from your favourite bakery.
However, this bread is still fantastic made with plain/all-purpose flour. Put it this way – I wouldn’t make a special trip just to get bread flour if I have a hankering for this right now. But I would go and get it if I was making this for company!
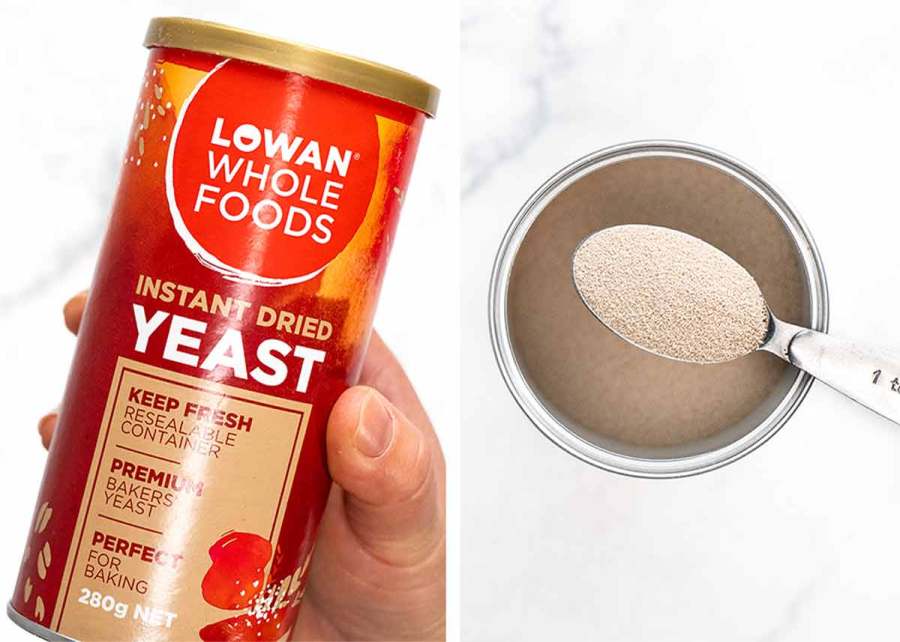
Instant yeast – The base recipe calls for Instant Yeast (aka Rapid Rise yeast) which does not need to be dissolved in water and left to foam. You can also use normal yeast (“Active Dry Yeast” or just “dry yeast”) – you just need to change the order of the steps and dissolve the yeast in water first. The bread will come out the same!
The cheese
I use Colby but you can use (almost) any meltable cheese you want (thoughts below). But I really urge you to:
Don’t skimp on quantity. I use a whole 250g/8oz (2 1/2 packed cups) in this bread. The early versions started with 1 cup, then just creeping up and up. For full-on unmissable OMG cheese flavour, 250g/8z is the amount to use! (In case you’re curious, I did creep up a little more but it started to weight the bread down. Cheese greediness backfired!)
Shred your own cheese. Store bought cheese is chunkier (so it weighs the bread down and won’t rise as well) and doesn’t melt because it is coated with anti-caking agents. For the best cheese ribbons and best cheese crust, grate your own! (But, in the event of a Cheese Bread emergency – and it can happen – packet shredded cheese will do).
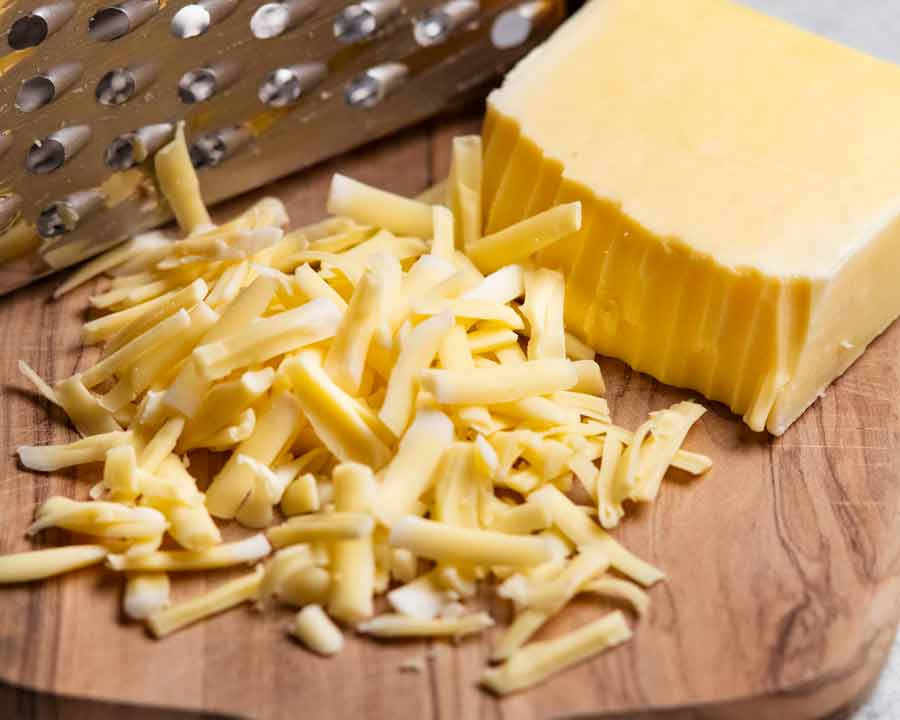
I use Colby – I like using Colby because it melts “softly” so it kind of melds into the bread crumb beautifully without weighing it down or bleeding oil. It also bakes up beautifully golden on the crust. For a premium version, I use gruyere. But it makes this considerably pricier!
Other cheese – Any cheese (other than mozzarella) that melts well will work great here, like cheddar, tasty, Monterey Jack, gruyere. I like Colby for it’s melting qualities and it doesn’t weigh the bread down as it rises in the oven, and it’s not greasy (like Tasty cheese). Re: mozzarella – it will work fine but it doesn’t have enough flavour in it compared to other cheeses.
How to make this No-Knead Cheese Bread
Heads up – There’s a lot of detailed information in this section to give bread first timers the confidence to make this. For experienced bread makers, this recipe is a cinch so I suggest you skip straight to the recipe or recipe video. 🙂
For those familiar with the beloved no-knead Crusty Artisan Bread – the method is the same except with cheese folded in and piled on top!
1. The no-knead bread dough
Dump everything in a bowl and mix. No kneading!
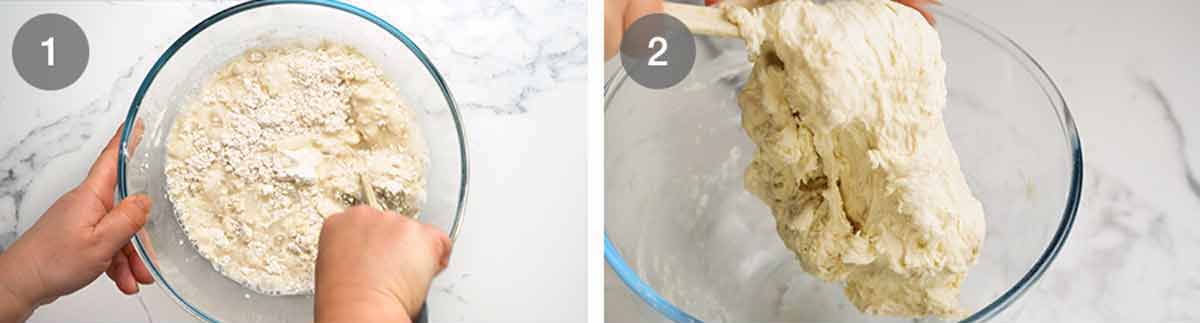
Shaggy dough – Using a rubber spatula, mix flour, salt and yeast in a large bowl. Add water, then mix using the handle of the spatula until you can no longer see flour.
Why the handle of the rubber spatula? Kind of mimics the dough hook of stand mixers. Less surface area to wipe gummy dough off.
Dough consistency – It should be too sticky to knead by hand, but not pourable like cake batter (see video at X seconds).
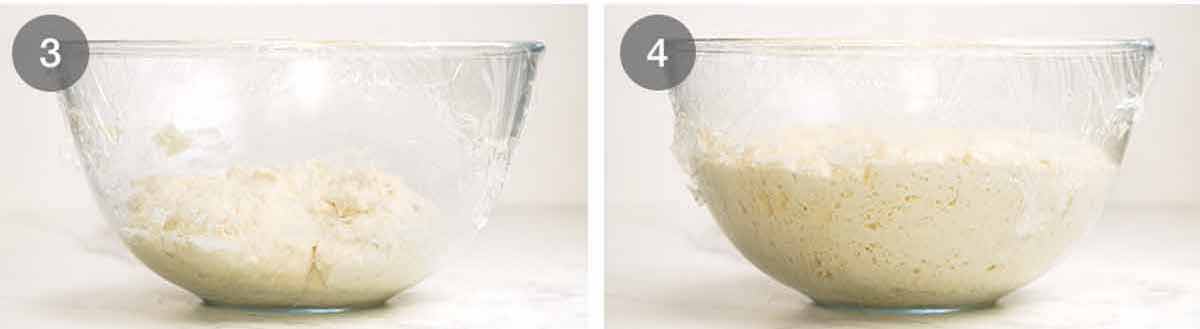
Rise – Cover with cling wrap and leave to rise in a warm place for 1 to 2 hours until the dough doubles in volume. The surface should be bubbly, and the mixture should jiggle when you shake the bowl.
What’s a warm place? 25°C/77°F+. Warmer = faster rise. Avoid direct sunlight, it dries out the surface of the dough. In winter, I sit the bowl next to a heater. In summer, anywhere in the house! TIP – your dryer Run it (empty) for a few minutes. Put bowl in, shut door. Nice and warm inside = perfect draught free dough rising location!
The proofed dough (ie rising the dough) – Aim for around double for the best bread rising. If it rises too much (eg triple) or not enough, then the bread will not rise enough or will collapse.
Dough, done – and you didn’t even get your hands dirty! Onto shaping, cheesing and baking.
2. Shaping and cheesing
This section is wordy. But in practice, it’s straight forward. You’ll see in the recipe video!
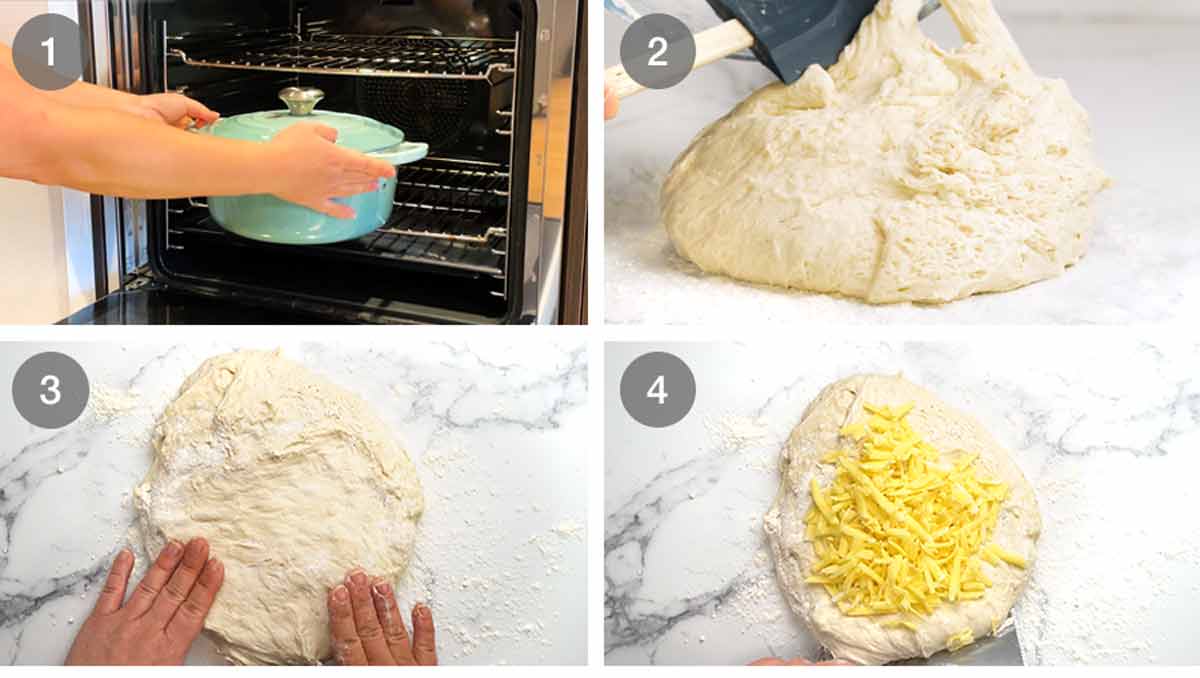
Pre-heat pot – 30 minutes before the dough is ready, put a 24-28cm / 4.5-8 quart heavy based pot with a lid in the oven. Then preheat the oven to preheat to 240°C/450°F (220°C fan-forced). We want that pot hot!
Curious why a hot pot? Read the Q&A in the No-Knead Crusty Artisan Bread. No dutch oven? That’s ok! Use a pan of water in the oven instead. Instructions in recipe notes.
Scrape dough out – Sprinkle a 30cm/12″ area with ~1 tablespoon flour. Scrape the dough out onto the flour using the rubber spatula.
Shape into disc – Sprinkle the surface with 1 teaspoon flour so you can pat it down into an approximate 20cm/8″ disc without the dough getting stuck all over your hands. No need to be meticulous about a perfect shape or size, just approximate is fine.
Cheese it – Set aside 1/3 of the cheese for topping. Cover surface with half the remaining cheese, leaving a 2cm/3/4″ border.
Folding the cheese inside the loaf
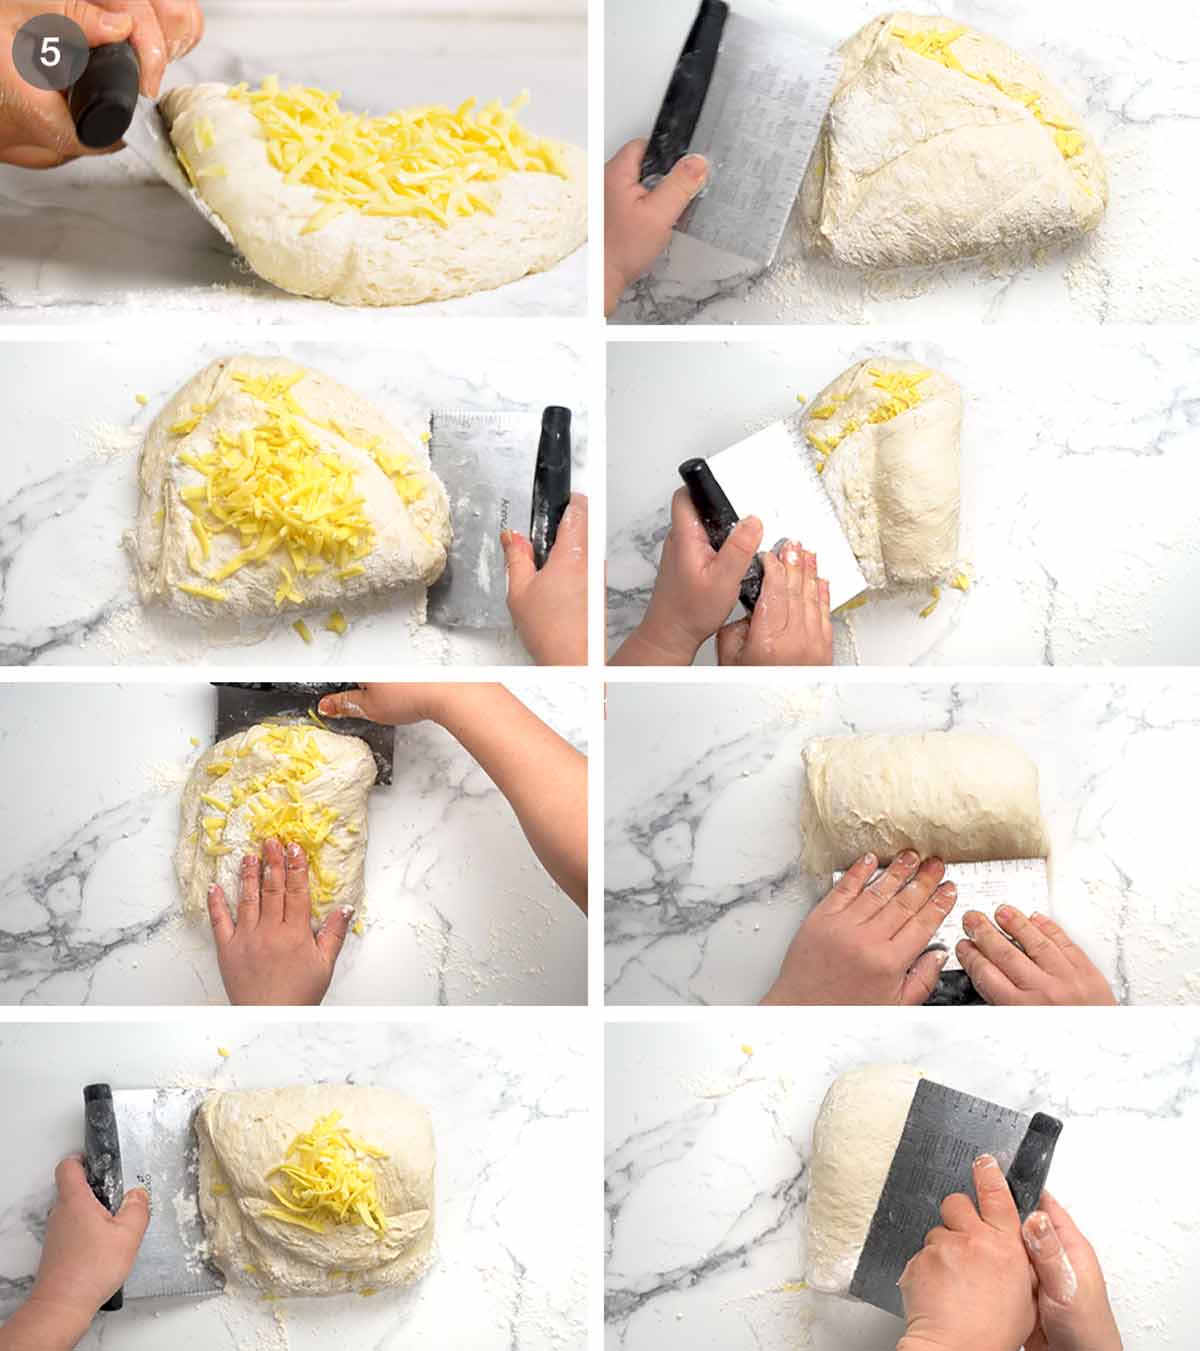
Fold inwards – Using a dough scraper or anything of similar shape (cake server, large knife, spatula), fold the sides inwards 4 times to roughly form a roundish shape. Sprinkle the scraper as needed to stop the dough from sticking to it.
Cheese each layer – After each fold, top the naked dough with some of the remaining cheese, but keep the final layer cheese-free as this will be the base of the bread.
Wonky is fine! Don’t worry about the shape at this stage. The purpose of the folding steps is to deflate the air bubbles in the dough and bury the cheese inside the bread.
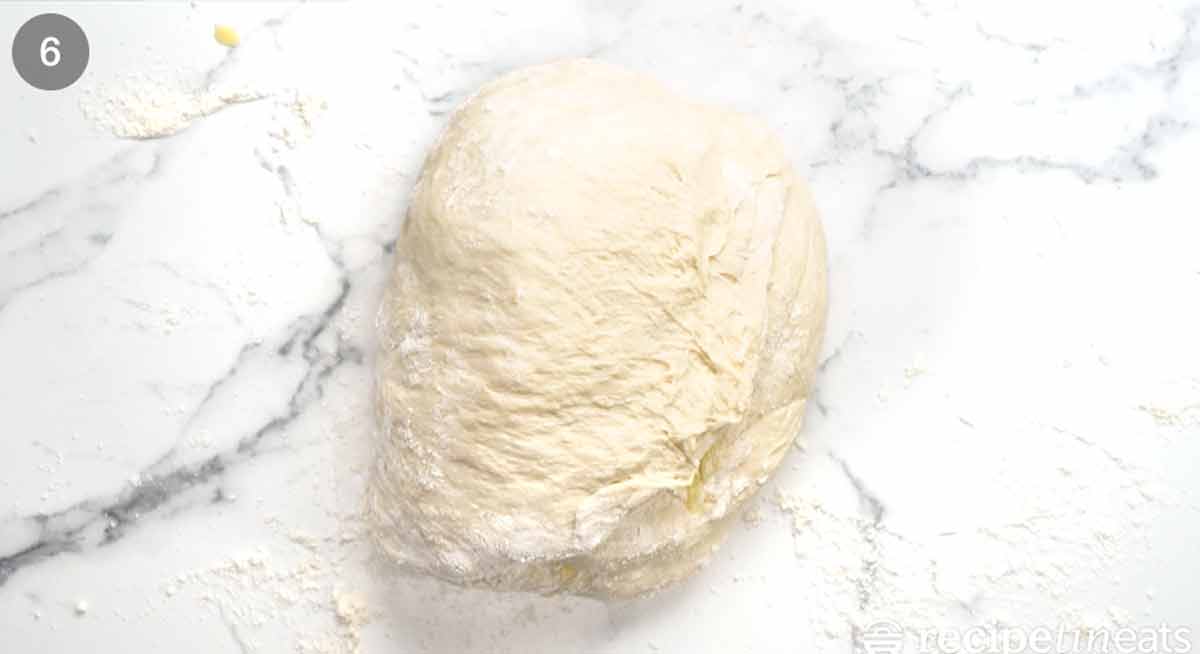
Paper transfer – Place a 40cm/16″ sheet of baking/parchment paper next to the dough then flip it onto the paper so the seamside is (mostly) facedown.
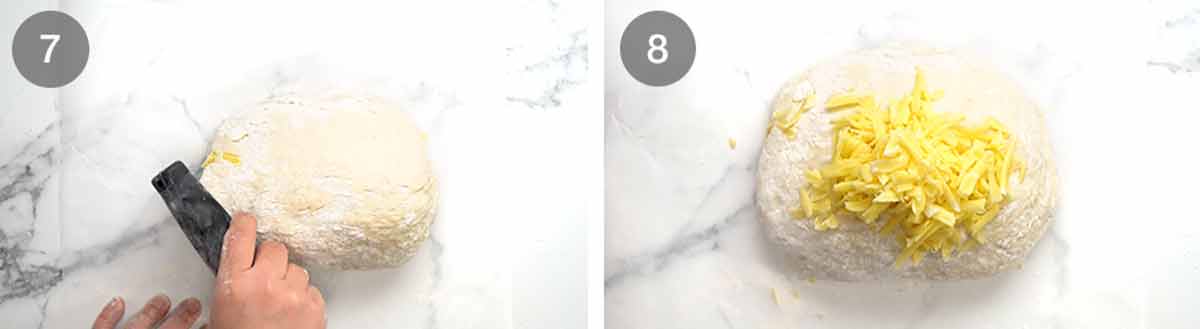
Tidy the shape roughly, using the dough scraper, into an even round or oval shape. Don’t bother being too fastidious here because no matter what shape the dough is, it always expands and rises into a perfect round shape, as dictated by the pot.
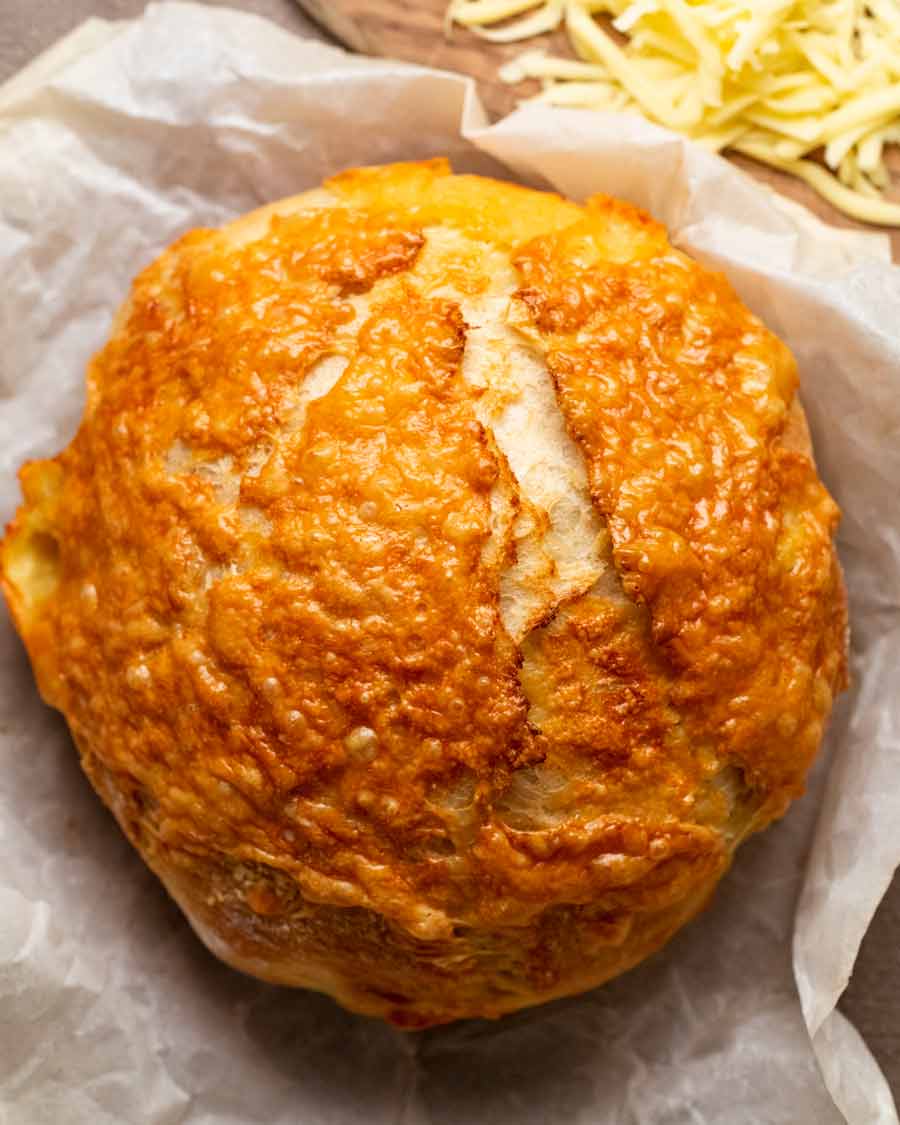
Cheese crown – Pile the reserved cheese on. It piles up high. Such a satisfying vision!
Baking time!
3. Baking (& eating)
Unlike the bread shaping, this part is delightfully short to explain in words!
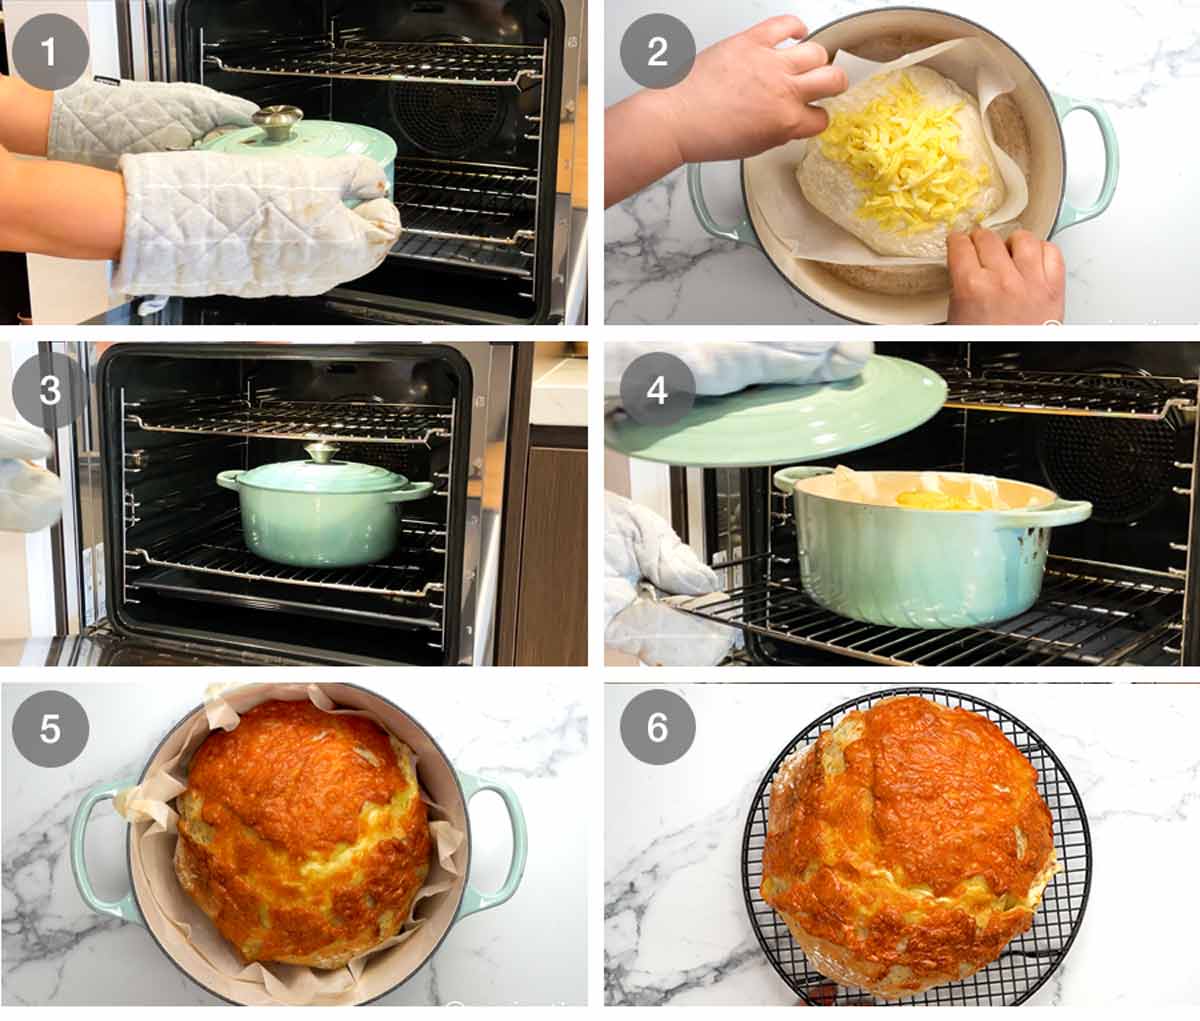
Take out hot pot – Remove hot pot from the oven.
Transfer dough – Hold the paper to transfer dough into the pot, keeping it on the paper. Put lid on.
35 minutes covered – Bake 35 minutes with the lid on.
10 minutes uncovered – Remove lid. Bake uncovered for 10 minutes to colour the surface.
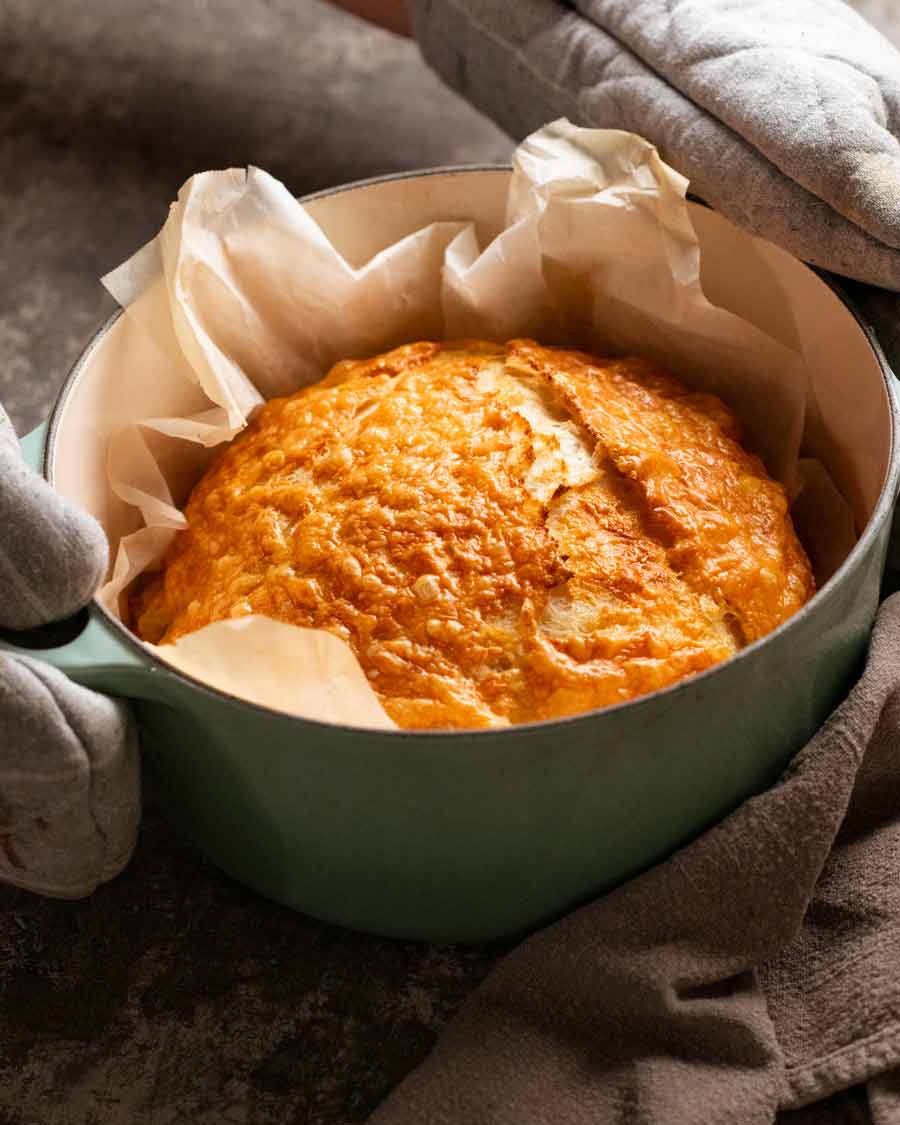
Transfer to cooling rack – Remove pot from oven. Use paper overhang to transfer bread onto a cooling rack. Slide paper out from underneath.
Rest for at least 10 minutes before slicing. Resting is important for breads! In this step, the inside finishes cooking and dries out. If you’re impatient and cut bread straight out of the inside, the inside will smear like it’s uncooked dough – even if it’s not. Yep, been there, done that. Patience is not my virtue – and I get punished for it!
Now, it’s time to EAT!
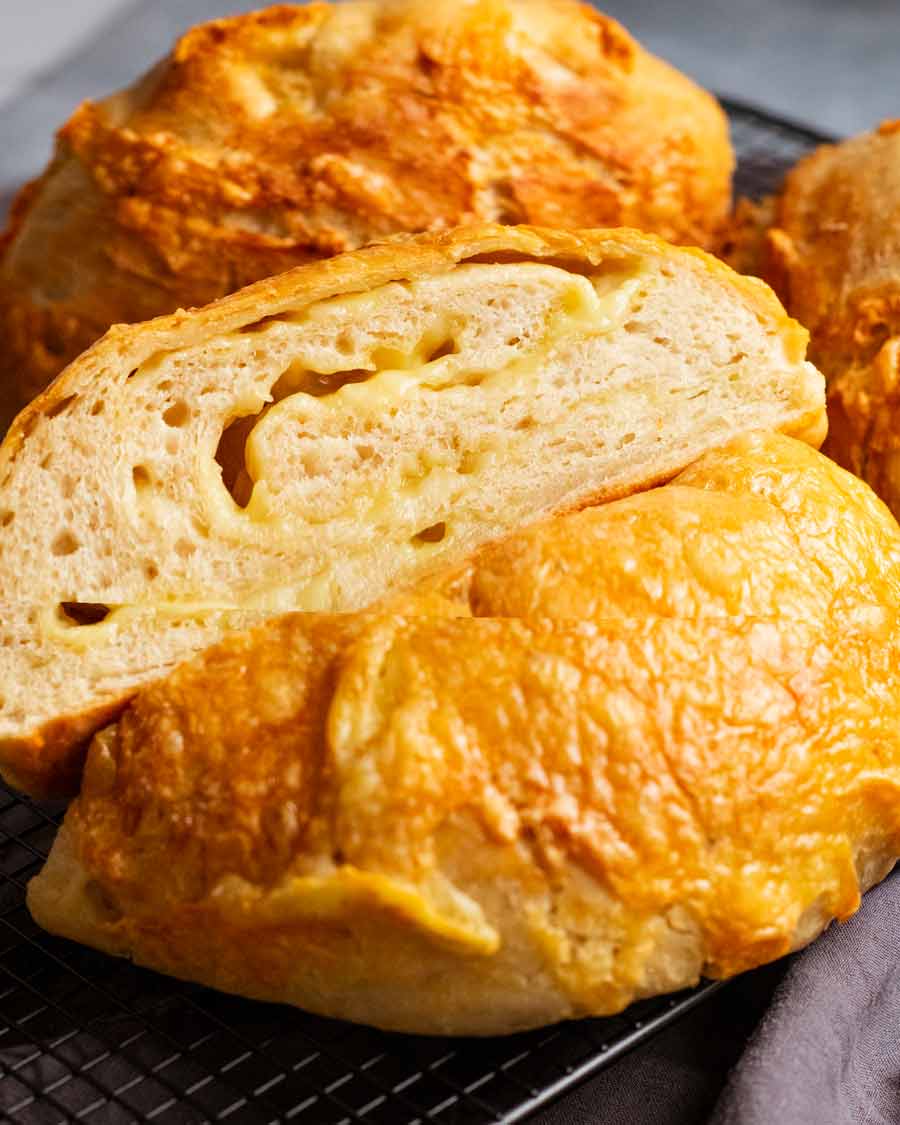
Note: The artwork of the cheese ribboned throughout is different every time. It’s like a surprise-inside!
Matters of serving and keeping cheese bread
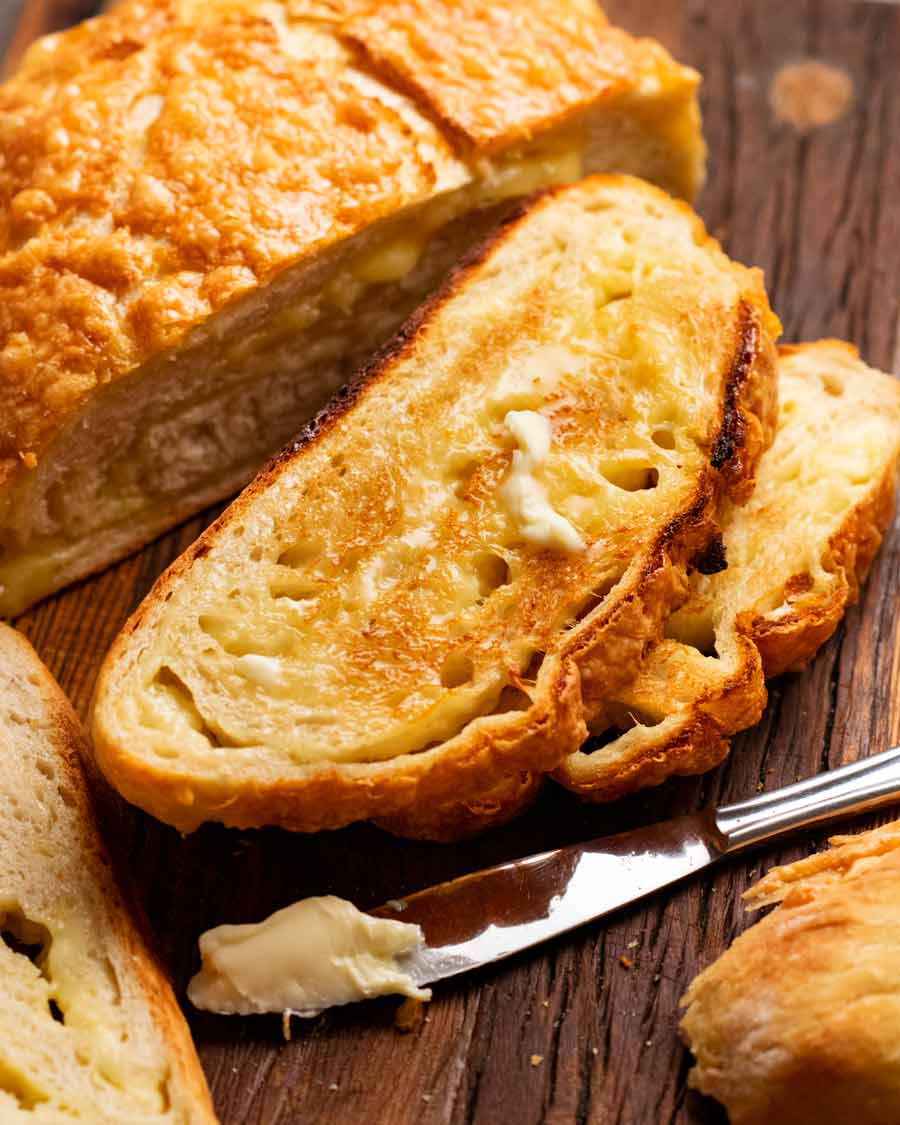
This bread, when hot and fresh, needs nothing to accompany it to be enjoyed. The cheese is molten, the bread is soft, the crust is salty and crispy.
However, you and I both know that a slathering of butter would only elevate the eating experience!
It stays fresh enough to eat un-toasted for around 24 to 36 hours. After this, just give them a quick toast in your toaster then slather with butter. The cheese on the surface of each slice goes golden and crusty, and you also get molten bits. It’s so good, you will forever hope for more cheese bread leftovers. – Nagi x
Watch how to make it
Hungry for more? Subscribe to my newsletter and follow along on Facebook, Pinterest and Instagram for all of the latest updates.
Cheese bread (no knead!)
Ingredients
- 3 cups bread flour (Note 1 re: plain/all-purpose flour)
- 2 tsp instant yeast aka rapid rise (Note 2)
- 1 1/2 tsp cooking/kosher salt
- 1 1/2 cups very warm tap water (Note 3)
- 2 1/2 cups (tightly packed) Colby cheese , freshly shredded (or other cheese of choice – Note 4)
Instructions
SHORTHAND RECIPE – for experts
- Mix dry ingredients, mix in water. Rise 2 – 3 hrs until doubled.
- Preheat pot 240°C/450°F (220°C fan). Turn dough out. Reserve 1/3 cheese for topping. Fold inwards 4 times, stuffed/layered with remaining cheese. Flip onto parchment paper. Pile reserved cheese on top.
- Bake 35 minutes covered, 10 minutes uncovered. Rest 10 minutes. Eat!
FULL RECIPE
Magic no-knead dough:
- Shaggy dough – Using a rubber spatula, mix flour, salt and yeast in a large bowl. Add water, then mix using the handle of the spatula until you can no longer see flour. The dough should be too sticky to knead by hand, but not pourable like cake batter (see video at X seconds).
- Rise – Cover with cling wrap and leave to rise in a warm place for 2 to 3 hours until the dough doubles in volume (Note 5). The surface should be bubbly, and the mixture should jiggle when you shake the bowl.
- Preheat pot – Half an hour before the dough is ready, put a 24-28cm / 4.5-8 quart heavy based pot with a lid in the oven to preheat to 240°C/450°F (220°C fan-forced). Note 7 for no dutch oven method.
Shape loaf:
- Pat into disc – Sprinkle work surface with 1 tbsp flour. Scrape dough out, sprinkle surface with flour, pat into a ~20cm/8" disc.
- Cheese it – Set aside 1/3 of the cheese for topping. Cover surface with half the remaining cheese.
- Fold inwards stuffed with cheese – Using a dough scraper or anything of similar shape (cake server, large knife, spatula), fold the sides inwards 4 times to roughly form a roundish shape, topping each layer of with the remaining cheese (but keep the final layer cheese free, it will be the base of the bread). (Note 6 for tips)
- Paper transfer – Flip the dough onto a sheet of parchment/baking paper so the seamside is (mostly) facedown. Tidy the shape if desired. (Note 6)
- Cheese crown – Pile the reserved cheese on.
Bake
- Hot pot transfer – Remove hot pot from the oven. Use paper to transfer dough into the pot, keeping it on the paper. Put lid on.
- Bake 35 minutes. Remove lid. Bake 10 minutes to colour the surface.
- Cool – Remove pot from oven. Use paper to transfer bread onto a cooling rack. Remove paper. Cool at least 10 minutes before slicing! (Note 8)
Recipe Notes:
Nutrition Information:
Life of Dozer
Freshly laundered bucket of Dozer toys. Let’s see how full that bucket is by the end of tomorrow.


Nagi, I’ve now made this twice since you sent it to us (and there are only two of us!) So added some mild green chili’s this time too, and will give half to the neighbors! This is the best ever!! Thanks!
Okay, so I’m 3 pieces in already. This is incredible! I roasted a head of garlic, chopped up the cloves and added them along with each cheese layer. I’ve made a lot of no-knead bread and was skeptical about the short rise but this is the best version yet, hands down. Thanks for a great recipe!
Another Million Star recipe Nagi ! Excellent instructions, incredibly delicious, simple to make. Thanks so much and hugs to Dozer.
Nagi, this bread is just awesome. I set my bowl in a sunny window and it rose more than double in one hour! I used finely grated sharp chedder. We had this for our Father’s Day dinner with a tri-tip roast.
It kept well in the fridge and reheated nicely. It took meals to polish it off as there are only 2 of us, so I think next time I will try a half ecipe and bake in a small iron pan with a lid.
Made this for my team at work, it disappeared in minutes! Delicious!
Can you make this with substitute flour mixes for people with celiac disease?
Wow!! I was pushed for time to get this out, but it was perfect. Will be a regular for us now….
Love these breads…so easy. Nagi – do you have a no-bead recipe for German Rye Bread (with seeds)
With a Monday salad! We’re a happy happy family. Monty dog gets a crust(well, half a piece of crust❤️)
As mentioned, I made this and it was delicious.
My question is, once risen can I freeze this dough?
And if so, can I freeze it with the cheese inside as well please?
As soon as I saw this recipe I knew I had to make it. Very easy and came out looking just like the photos. I especially love the crispy cheese on top. It’s almost a meal in itself, and was great paired with your mushroom soup.
Made mine with 1/2 c cheddar, 1 c gruyere and 1 c gouda, and it was exquisite. Full of flavor and oh so easy to make. Will keep this in the front of my recipe book!
Keen to try this recipe! I have an extra large dutch oven. Would this be ok to use? Or will I end up with a slightly flatter loaf?
Terrific bread. A cinch to make. Made mine with sharp cheddar but can envision it using different cheeses. Served this along with your Chicken Marsala and Mega Italian Salad for a total Nagi dinner. All three are keepers and we will be making them again soon.
Hi Nagi.
Do you have a variation for using a sourdough starter for this cheesy bread please?
Would this work?
Thanks.
Today was meal prep day and I got this going first so it could rise while I was prepping other food. So incredibly easy, it’s almost embarrassing how good it is! Never a doubt with recipes from this site. Always delicious!
I just made this ahead for tomorrow’s lunch. I will whack it back in the oven for a bit, prior to serving.
I’m in the U.K. and we don’t have Colby, so I used Gouda as a sub. I might put a bit of cheddar on top tomorrow, as it looks a bit pale, but I think it’s melted well, and it smells awesome!
Is this recipe in your cookbook? Thanks!
Hi Linda, this is not in the cookbook. It’s a new recipe.
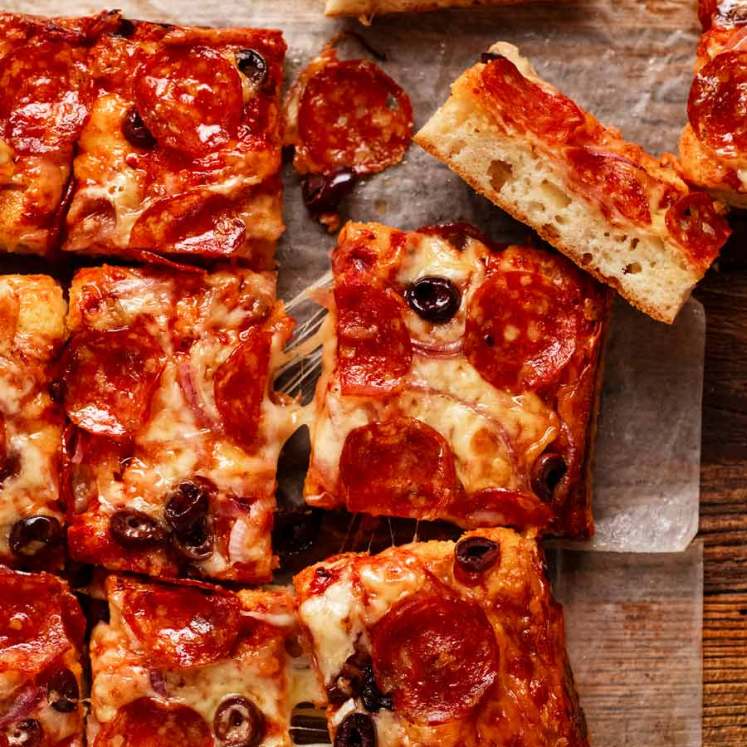
I needed something to bake with my kids, that I thought they actually might eat (sadly they didn’t like the lunchbox pizza-bread, Nagi’s recipe, which my husband and I devoured instead). We set to work on a rainy, chilly saturday morning. 4 boys aged 6 and under – They loved helping measure and mix the ingredients, and the persistent ‘is it ready yet?!’ I hadn’t really thought through when planning to make this recipe, overlooking the 2hrs rising time ha!
In any case, once the cheese was grated and dough folded up, they switched to asking when the bread would be baked (thankfully only 35 mins this time!). We were rewarded with a delicious, fluffy, chewy-crust bread with delicious swirls of cheese. The kids loved it so much they asked for cheese bread for their ‘dessert’ after dinner! Winner. Next time I’d love to experiment with some rosemary and maybe whole garlic cloves too. Certain this will become a regular bake here, useful for more healthful kids snacking, perfect to go with soup, and lunchboxes alike.
My husband ate a slice and said it was the best bread ever! Another fabulous recipe xx